Assemblies
Learn how to assign multiple components to a common assembly.
Transcription:
In this video, I will show you how we can assign these four lenses here to one common assembly.
The advantage of an assembly is the own coordinate system.
With the own coordinate system, all lenses or elements inside, an assembly can be moved together by this own coordinate system.
And this is especially of advantage if we would like to create more complex systems as off axis systems or folded systems in which several elements are folded or moved together.
A second advantage is if we will perform a tolerance analysis If we assign several lenses together in different assemblies, we can perform a tolerance analysis for each assembly separately and therefore tolerance the whole system in a much more realistic way as it will be later in the production process.
To add an assembly here to the optical design editor, we go here to the construction tab and then click here on assembly, or we could also click here with the right mouse button and then click here on add assembly.
As we can see this assembly has been added here to the optical design editor.
And now to assign these lenses to the assembly, we just take them by drag and drop and move them into the assembly.
And as you can see, all these lenses are now here inside this assembly.
And if you click on this assembly, we can see that all the lenses here are highlighted in orange, which means that they are all together in this assembly here.
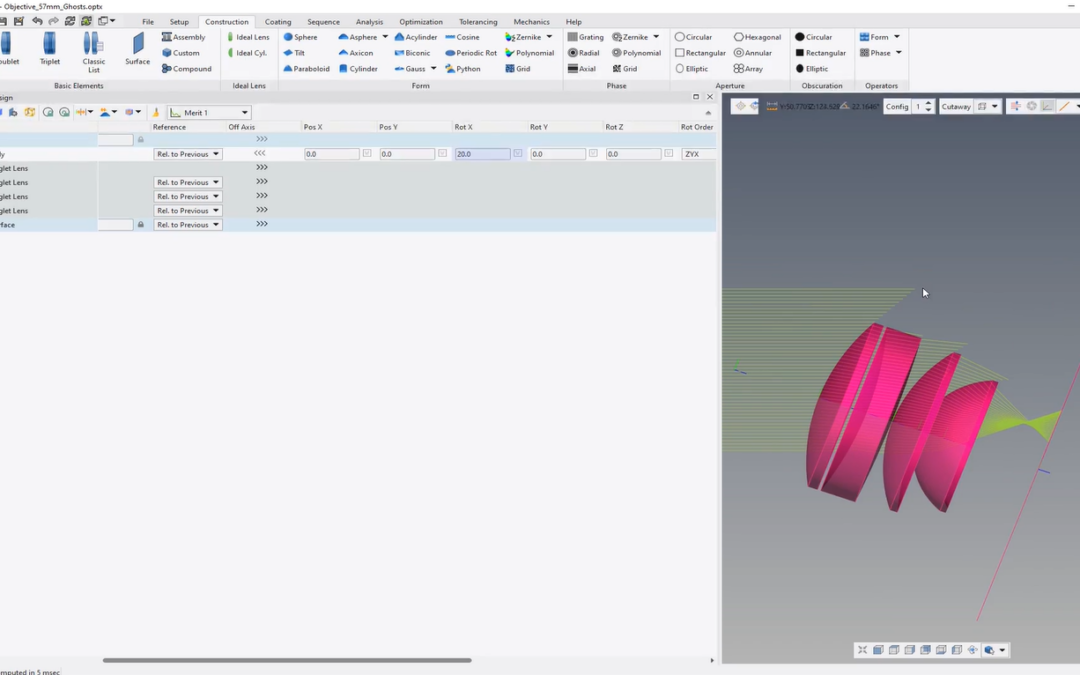
And if we move here this assembly now in position set, for example, by twenty millimeters, we will see that all lenses will move together because they have an own coordinate system, which is yeah here this assembly coordinate system.
Also, if you would like to rotate this assembly, for example, here by twenty degrees, we can see that all lenses here are rotating together because the whole assembly is rotating, and therefore the lenses which are assigned to the assembly will rotate as well.
Thanks for watching.