Computing and GUI Performance
Learn how to increase the computing speed and GUI performance by following some tips.
Transcription:
In this video, I will show you several options to enhance the computational performance and to increase the speed of the graphical user interface.
Some basic information first.
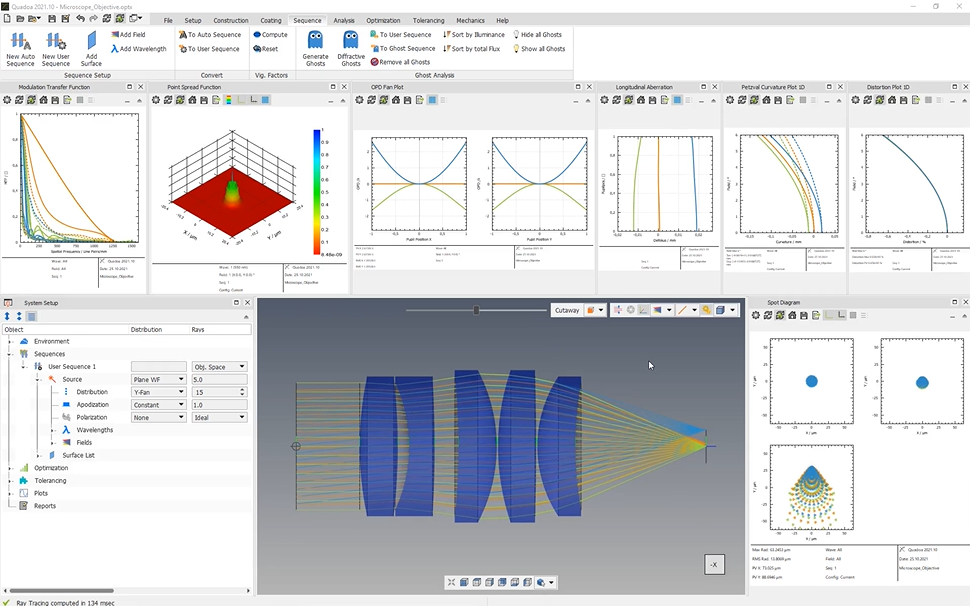
As soon as the user applies a change to the optical design by editing a parameter or adding an element, Quadua will trace the rays that are visible in the three d view and will update all the plots that are currently opened.
So by changing a parameter, for example, the rotation of this lens, you will see that it will take some time depending on your CPU speed to compute and refresh the plots and the three d view.
The advantage of the auto update is that it allows the user directly to see the effects of the changes on the optical system and gives an intuitive feedback on the changes.
However, in some cases, this direct update may not be desired.
And therefore, I will show you how to increase the computational performance by changing some settings.
So the first solution is to disable the global auto update button here in this, quick access toolbar And when the global auto update is deactivated, the plots won’t be updated automatically when a change is done, but the plots can be updated manually just by clicking here this update button.
The second solution to enhance the computational speed is to disable the auto update button only for computationally intensive plots, as for example here this point spread function.
And to do so, we just click here on this auto update and for less computationally intensive plots, we activate the global auto update again.
So all the plots which have this auto update activated will be automatically up updated and in this case here this point spread function, which is computationally intensive has to be updated manually.
Another solution is to decrease the number of rays in the three d view since the number of rays for any analysis plot is totally independent from the number of rays in the three d view, it is typically not necessary to work with large amounts of rays.
And therefore, it is recommended to keep the number of rays to do to be displayed in the three d view as low as necessary.
So for that, we can just go here to the system setup, to our source, and here under the distribution, we can set here the number of rays to, for example, five.
In this case, it does not matter if there are fifteen or five rays, but it will have an impact if we have several thousands or even million of rays.
Hiding a sequence also enhances the computational performance since the rays will not be traced on the update.
Besides, hiding of the sequences does not affect the analysis plots and the hidden sequence will still be considered in the analysis.
So for that we can, for example, hide here one of the three fields to enhance the computational speed of the graphical user interface. It is therefore recommended to set only the sequences, fields, and wavelengths to visible that you’re currently working on.
To enhance the performance when performing a ghost analysis, all ghosts can be set to hidden in the sequence tab just by clicking here on hide all ghosts.
And furthermore, when generating the ghosts here in the ghost wizard, you can check this hide ghosts checkbox, and when generating the ghosts, the ghosts will be automatically hidden.
And this is recommended for large systems with a large number of surfaces.
Thanks for watching.