Raytracing
Learn how to use the auto-sequence feature to trace a light sequence through a singlet lens by adding a source and an imaging surface.
Transcription:
In this video, I will show you how to, trace rays through the singlet lens here.
And for that, we will first open the optical design editor. And for that, we go here to the Windows icon and click on optical design editor.
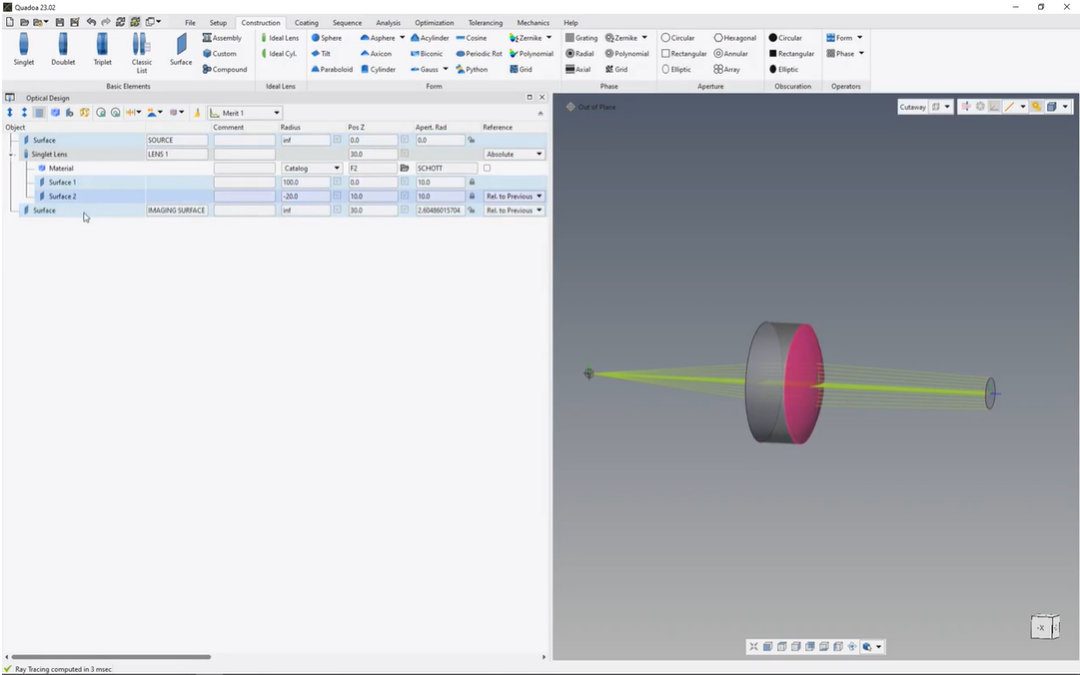
Here in the optical design editor, we can see here our lens, And what I would like to do is to add two additional surfaces, one for the source, surface and one as the imaging surface.
And to add additional surfaces, we click here with the right mouse button and click on add surface.
Now we can see that here the surface has been added.
We can rename it in, for example, source.
And now we will take it just by drag and drop, and we’ll move it above the singlet lens to the very first position.
Now I will move this singlet lens in zed direction by, for example, thirty millimeters because the lens was here at the same position zero as the the, source surface.
And now we can see that here the, the rays are being traced from our, source surface here at position zero to our singlet lens.
In the next step, I will add another surface for the imaging surface.
We could also click here with the right mouse button to add a surface, or we’d go here to the construction tab, and we could just click here on the surface icon.
Now the surface has been added. We will rename it in image and surface.
And again, it’s at position zero in set direction, and I will move it in set direction by, for example, thirty millimeters.
And now we can see that here, the surface has been added here to this position.
We can see that here now the rays are starting at our source surface and going through our lens to the image and surface.
And what’s happening right now is that the the rays, they are starting here at our first, source surface, going here to the first surface of our lens, then going to the second surface of our lens, and then ending here at the image and surface.
This means that, in the case that an autosequence, which is default setting in Quadua, is selected, the rays will start at the first position, so at the first surface, and will go from top to bottom through our system and ending at the last surface.
And to check whether the auto sequence is, selected, we go again here to the Windows icon, click here in system setup, and here in the system setup editor under sequences, we can see here that this auto sequence is selected.
Thank you for watching.