Material Substitution
Learn how to optimize materials using extended optimization.
Transcription:
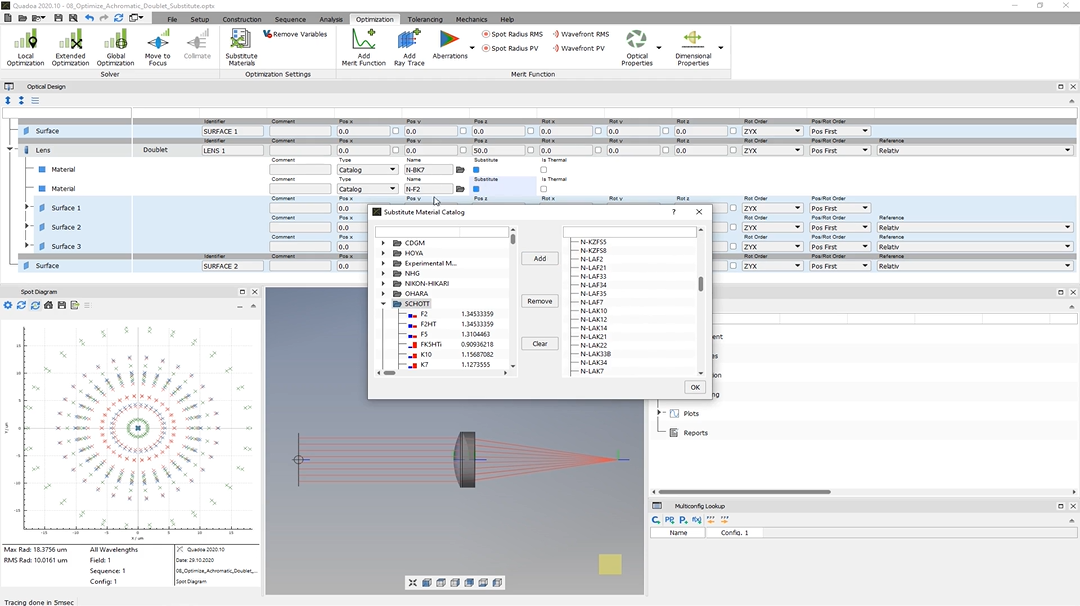
In this video, I will show you how we can substitute here these two materials.
We designed here the system in the previous video.
And in this video, we try to change here these materials in order to decrease here our spot size radius.
So to substitute these materials, we see here this checkbox with the name substitute, and we will just select these two checkboxes.
And here under the optimization settings, we see here this button with substitute materials.
And here we see the material catalog.
And if we open, for example, here the shot catalog, we see here the materials.
And now we can add the materials here, which we would like here to check if they are if they could fit here into our system.
So you can just select the material, click add, or you can remove them again.
So in my case, I will just add here the complete shot catalog.
So all these materials here can be inserted here for the material.
I click here okay.
And now we go here to the extended optimization.
And here we see the number two in brackets. So these are the two substitute check boxes or substitute variables here for the two materials.
So here, again, we see the merit function.
And here, we can select whether we would like to have an update of the three d view and the plots while optimization.
So I select here yes, and now I click on optimize.
And what we will see now is that here the materials will be changed.
And also here the spot size for all wavelengths is decreasing.
Okay. So that’s fine. And now we see that here the material has changed, and also our spot size for all wavelengths has decreased and the maximum radius is now nine microns.
Thank you for watching.