Stray Light/Ghost Paths
Learn how to generate, analyze, and sort ghost paths.
Transcription:
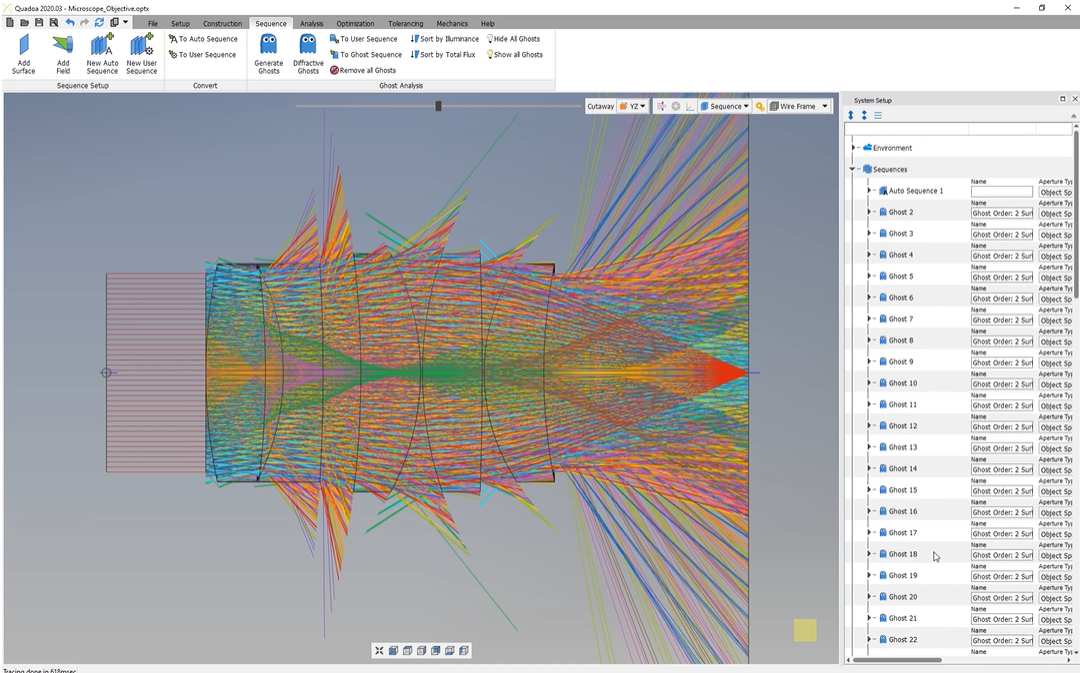
In this video, I will show you how we can perform a ghost analysis as shown here in this three d view.
To create these ghosts, it will take just a few clicks and just a few seconds.
So it’s really simple and easy to perform a ghost analysis during our design process.
So to create these ghosts, we have to go here to the sequence menu. And before, I will remove these ghosts because then we will create them back. So we just click here on remove all ghosts.
And right now, you see that the ghosts were deleted.
And if you take a look here at the system setup, here under the sequence title, we see that here our sequence is the default auto sequence here.
So to create these ghosts, we will find here this button generate ghosts.
And if you click here this button, we see that here the ghost sequence editor is opened.
And here, under sequence, we can select the sequence on which we would like to create a ghost. So in this case, we only have one sequence here, this auto sequence one. So this auto sequence one is here, automatically set.
Here at the ghost order, we can select the first order or the second order. So if you would like to have a single or a double reflection on our surfaces, so we select here the second order.
We don’t want to hide the ghost, so we just click here on okay.
And right now, we see that the ghosts have been created here just within six hundred milliseconds, so it’s really fast.
Here at the top, we can see here this icon, and here we can, color the the ghost sequences by the lambda value, by our field, or by sequence.
And I would like to color the ghosts by the sequence. And right now, we see here the different colored ghosts and here also the different foci of each ghost.
To analyze these ghosts, we will go here to the system setup. And here under the sequence title, we see that here the ghosts were inserted.
So we see here, sixty seven ghost sequences were inserted to the system setup, and I would like to order them here by the maximum impact on our imaging surface.
And for that, we can find here these two buttons, sort by maximum illuminance on the last surface in our sequence, and here sort by the maximum total flux on our imaging surface.
And in this case, I would like to, sort these ghosts by the maximum illuminance on our imaging surface. So we just click here.
And right now, we see here that the ghosts were sorted.
And what happened right now is that also the ghosts here in the system setup were sorted.
So the ghosts here on the top with the number two has the most impact on our image and surface. And here the ghosts with the number sixty seven has the least impact, on our image and surface. So the ghost number two is the worst.
And if we open the ghost here, you can also see here the exact, ghost path here through our system. And what I would like to do is to hide all ghosts because I would like to analyze one by one. So we just click here hide all ghosts. We can also hide here our auto sequence just here by clicking hide.
And now I would like to analyze, for example, here the ghost number four. We just click here with the right mouse button, select show, and we see here the ghost number four has shown up. And we see here that here the reflection is taking place here at the last surface and reflected here back on this surface.
And you can see this also here. So it’s reflected once by surface eleven and once at surface nine.
And if we open here it, you can also see here, this ray path.
So you see it’s really it’s really simple here to to create these ghosts, and it really takes, just a few clicks.
Thanks for watching.