User Sequence
Learn how to define user-sequence custom ray paths.
Transcription:
In this video, I will show you how we can create a user sequence.
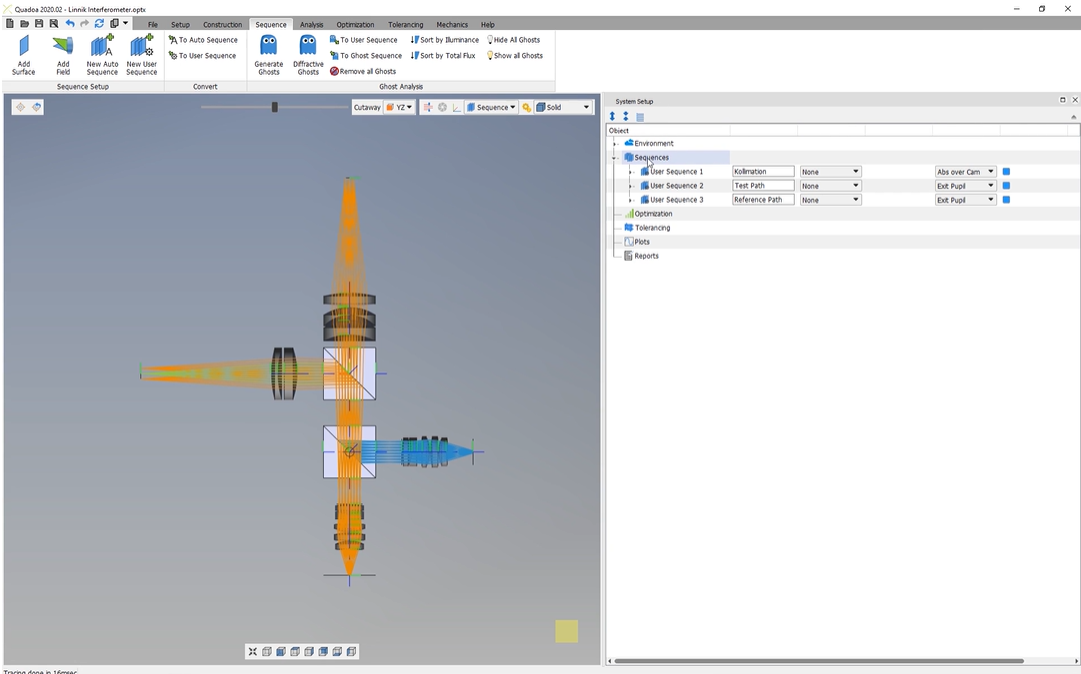
You can see here this model of this linic interferometer, which is also in the examples folder.
And what you can see here is that we have here different optical paths.
So a user defined sequence is compared to an auto sequence completely individual in the optical path. So we can define complete individual the way, the rays will take in our system. So for example, we see that here the blue rays, they are here, reflected at the surface here, and the orange rays, they are going also another way. So we can we we can easily create this with an user defined sequence.
As you can see here under the system setup here, the under the sequence title, you can see here these three user defined user sequences, and I will show you how we can create them.
For that, I’ve prepared here the simple system with these four surfaces, the source surface, surface two, surface three, and the imaging surface.
And I would like to create a reflection here at surface three back to surface two.
And for that, we will go here to the system setup.
And here under sequences, we will convert this auto sequence to a user sequence.
For that, we just click here with the right mouse button and just click here on convert to user sequence.
And now we see that the auto sequence was converted to the user sequence, and here the surface list was added.
And if we open here the surface list, we can find here the surfaces as we created them in the optical design editor. And also here the identifier names are the same as here given in the optical design editor.
In the next step, we just select here the surface on which we would like to add the reflection, so the surface three. And here from the surface action drop down menu, we just select here the action reflection.
And we see that the transmission is gone because we selected here the reflection.
We will add now a new surface here to the surface list just by clicking the right mouse button here on the surface list and select add surface.
And we will just take the surface by drag and drop and drag it above the image and surface here.
From the identifier drop down menu, we will select here the surface two, and here we will select as the surface action again a reflection because we want the reflection back here to the image and surface.
And we will add another surface.
Take it again by drag and drop, drag it above the image and surface, select the identifier name, so surface three, and select the transmission.
And now we have created here this reflection.
Thanks for watching.